
 English
 Español
 Deutsch
 日本語
日本語 Français
 Nederlands
 Türkçe
















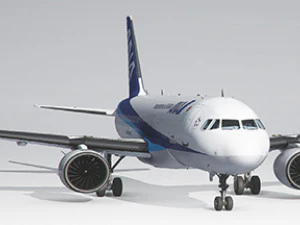
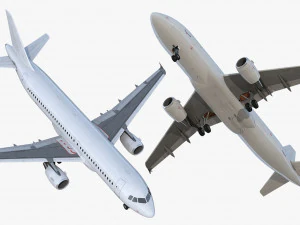
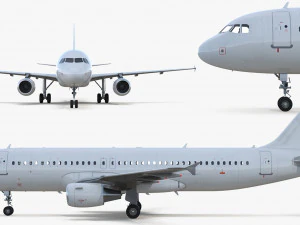
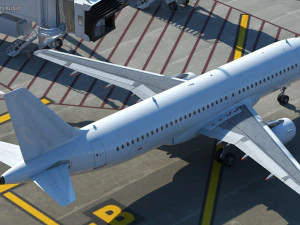
프린트 여객기 21 3D 프린트 모델
$
21.00 USD
- 작성자에게 제품 지원 요청

- 이용 가능한 포맷:
- 아이템 ID:459282
- 날짜: 2023-08-12
- 컬렉션:No
- 프린트 준비:Yes
- 3D 스캔:No
- 성인용 콘텐츠:No
- PBR:No
- 조회:2145
설명
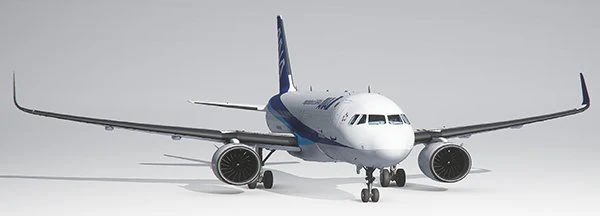
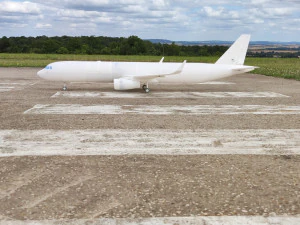
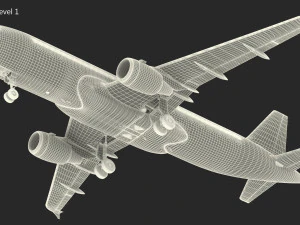
This is a 3D printed Airliner I designed to be light wight and fly on two 70mm EDFs.This Plane NOW FITS ENDER 3
Build Volume required is 220x220x250. The fuselage parts are 230mm tall.
RTF weight: 3,360 grams
Wingspan: 1.6m
Length: 2m
Print time: 220hrs
2kg of PLA
This plane does not have flaps or retracts to save on weight and keep the build process simple and easy. Also to keep cost down a bit.
Use 1mm Carbon fiber rods cut to 18mm for alignment of the fuselage parts do not glue them it makes it harder to get the parts together.
The battery door uses 8x 5mmx3mmx10mm magnets.
8mm Carbon tubes (Wing) 2x 19in and 2x 18in the 19in goes in the front.
Nose gear uses a small section of 6mm carbon tube and the Main gear both use a small section of 8mm carbon fiber tube.
Use 2x8 mm screw to attach servo covers and engine cover.
I modified two parts to make this build fit on an ender 3 build plate. Wing Section 1 is cut into two parts use 3 sections of 1mm carbon rods to align Wing1A to Wing1B. I also needed to cut the Mount bracket for the EDF. It is now in 4 sections to fit the smaller build plate. Glue together as shown in picture for the Ender 3 assembly Guide. If you have a larger build volume such as 245x245x260 you can print the original Wing1 and Motor mount to allow less assembly.
3D PRINTING SETTINGS
Fuselage 1-8 Print will 20mm rim on the build plate. Set the Extruder closer then standard to the bed. The first layer will print on the bed without the 20mm rim the second layer will start a 20mm rim you want the second layer to adhere to the bed.
Layer Height - 0.2
*Initial Layer Height - 0.15
Wall Line Count - 1
Top Layer - 0
Bottom Layers - 4
Initial Bottom Layers - 0
Infill - 0
Surface Mode - Normal
Fuselage 9:
Layer Height - 0.2
*Initial Layer Height - 0.15
Wall Line Count - 1
Top Layer - 4
Bottom Layers - 0
Initial Bottom Layers - 0
Infill - 0
Surface Mode - Normal
All of the wing section, elevator sections, gear, etc are of the left side of the plane. Set the part on the build plate with the correct orientation then mirror the part to get the right side of the plane. When you place the part on the build plate and rotate to a 45 degree angle when you mirror the part rotate the part back to the same 45 degree angle to get the same infill pattern for both parts.
Wing1 - 114g
Wing2 - 64g
Wing3 - 35g
Wing4 - 10g
WingTip - 3g
Aileron - 6g
Wing 1-4, Wingtip, Ailerons, and all of the tail sections:
Layer Height - 0.2
Initial Layer Height - 0.15
Wall Line Count - 1
Outer Before Inner Walls - Checked
Top Layer - 5
Bottom Layers - 4
Initial Bottom Layers - 4
Infill - 3%
Infill Pattern - Cubic Subdivision
Infill Line Directions - [45]
Infill Before Walls - Not Checked
Print Speed - 40mm/s
Infill Speed - 40mm/s
Outer Wall Speed - 40mm/s
Travel
Enable Retractions - Checked
Retract at Layer Change - Checked
Combing Mode - off (this will allow the retractions to happen and prevent sub extrusion)
Surface Mode - Normal
Front Cowl
Layer Height - 0.2
*Initial Layer Height - 0.15
Wall Line Count - 1
Top Layer - 6
Bottom Layers - 3
Initial Bottom Layers - 3
Infill - 0
Surface Mode - Normal
Rear Cowl there is a thrust tube designed to fit over the back of the 70mm EDF place on bed with back of cowl on the build plate.
*Initial Layer Height - 0.15
Wall Line Count - 1
Top Layer - 0
Bottom Layers - 0
Initial Bottom Layers - 0
Infill - 0
Surface Mode - Normal
Tail Pipe I designed the Cowl to have interchangeable tail section to change the performance of the EDF I flew my plane with the 90% FSA tail pipe the 80% will have more speed and less thrust. You can leave this section off also to get more thrust and less speed. The 80% have a more scale look.
*Initial Layer Height - 0.15
Wall Line Count - 1
Top Layer - 0
Bottom Layers - 3
Initial Bottom Layers - 3
Infill - 0
Surface Mode - Normal
다른 포맷이 필요하세요?
다른 포맷이 필요하시면, 새로운 지원 티켓을 열어 요청하세요. 저희는 3D 모델을 다음으로 변환할 수 있습니다: .stl, .c4d, .obj, .fbx, .ma/.mb, .3ds, .3dm, .dxf/.dwg, .max. .blend, .skp, .glb. 자유 형식 변환우리는 3D 장면을 변환하지 않습니다 .step, .iges, .stp, .sldprt와 같은 형식도 포함됩니다.!
사용 정보
프린트 여객기 21 - 기본 또는 확장 라이선스에 따라 이 로열티 프리 3D 모델을 개인적 및 상업적 목적으로 사용할 수 있습니다.기본 라이선스는 디지털 광고, 디자인 및 시각화 프로젝트, 비즈니스 소셜 미디어 계정, 네이티브 앱, 웹 앱, 비디오 게임, 그리고 물리적 또는 디지털 최종 제품(무료 및 유료 모두)을 포함한 대부분의 표준 사용 사례를 포괄합니다.
확장 라이선스는 기본 라이선스에 따라 부여된 모든 권리를 포함하며 사용 제한이 없으며, 로열티 프리 조건 하에 3D 모델을 상업적 프로젝트에 무제한으로 사용할 수 있습니다.
더 보기
환불이 보장되나요?
네, 환불을 보장합니다. 작품 구입 후 렌더나 설명에서 오류를 발견하시면, 저희는 최대한 빨리 해당 문제를 수정 할 것입니다. 저희가 해당 오류를 수정 할 수 없는 경우, 저희는 귀하의 주문을 취소하며 아이템 다운로드 24 시간 내에 금액을 환불해드립니다. 더 자세한 정보는 여기를 참조하세요키워드
이 아이템에 대한 코멘트 없음.