English
 Español
 Deutsch
 日本語
日本語 Polska
 Français
 中國
中國 한국의
한국의 Українська
 Italiano
 Nederlands
 Türkçe
 Português
 Bahasa Indonesia
 Русский
 हिंदी
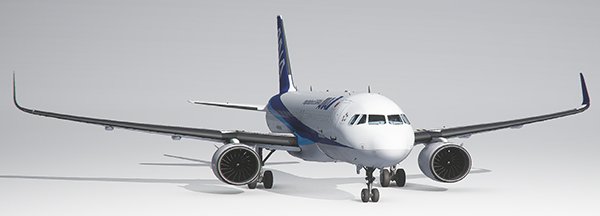
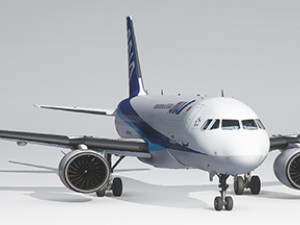
हिंदीAvión de pasajeros impreso 21 Modelo de impresión 3D
$
21.00 USD
onclick="showLoginForm('Login');return false; ga('send', {'hitType': 'event', 'eventCategory': 'ShoppingCart', 'eventAction': 'checkout', 'eventLabel': 'CheckoutCredit' });"> Comprar con Créditos
Tienes usted $0.00 Créditos. Comprar Créditos
- Solicitar soporte de producto

- Formatos disponibles:
- ID de artículo:459282
- Fecha: 2023-08-12
- Colección:No
- Listo para Imprimir:
- 3D Scan:No
- Para adultos:No
- PBR:No
- Vistas:1680
Descripción
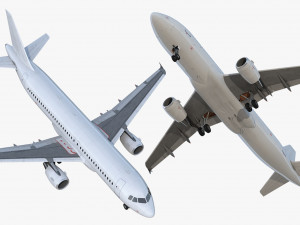
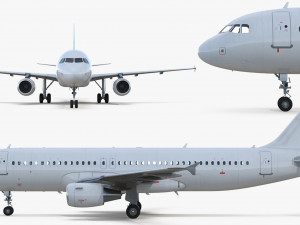
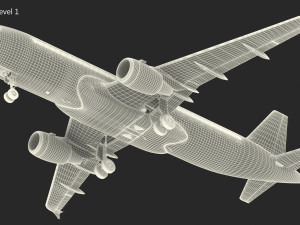
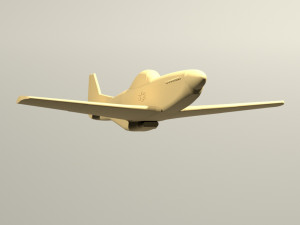
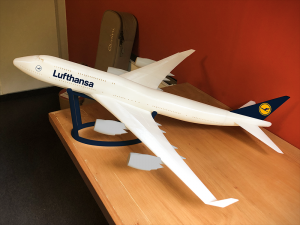
This is a 3D printed Airliner I designed to be light wight and fly on two 70mm EDFs.This Plane NOW FITS ENDER 3
Build Volume required is 220x220x250. The fuselage parts are 230mm tall.
RTF weight: 3,360 grams
Wingspan: 1.6m
Length: 2m
Print time: 220hrs
2kg of PLA
This plane does not have flaps or retracts to save on weight and keep the build process simple and easy. Also to keep cost down a ***.
Use 1mm Carbon fiber rods cut to 18mm for alignment of the fuselage parts do not glue them it makes it harder to get the parts together.
The battery door uses 8x 5mmx3mmx10mm magnets.
8mm Carbon tubes (Wing) 2x 19in and 2x 18in the 19in goes in the front.
Nose gear uses a small section of 6mm carbon tube and the Main gear both use a small section of 8mm carbon fiber tube.
Use 2x8 mm screw to attach servo covers and engine cover.
I modified two parts to make this build fit on an ender 3 build plate. Wing Section 1 is cut into two parts use 3 sections of 1mm carbon rods to align Wing1A to Wing1B. I also needed to cut the Mount bracket for the EDF. It is now in 4 sections to fit the smaller build plate. Glue together as shown in picture for the Ender 3 assembly Guide. If you have a larger build volume such as 245x245x260 you can print the original Wing1 and Motor mount to allow less assembly.
3D PRINTING SETTINGS
Fuselage 1-8 Print will 20mm rim on the build plate. Set the Extruder closer then standard to the bed. The first layer will print on the bed without the 20mm rim the second layer will start a 20mm rim you want the second layer to adhere to the bed.
Layer Height - 0.2
*Initial Layer Height - 0.15
Wall Line Count - 1
Top Layer - 0
Bottom Layers - 4
Initial Bottom Layers - 0
Infill - 0
Surface Mode - Normal
Fuselage 9:
Layer Height - 0.2
*Initial Layer Height - 0.15
Wall Line Count - 1
Top Layer - 4
Bottom Layers - 0
Initial Bottom Layers - 0
Infill - 0
Surface Mode - Normal
All of the wing section, elevator sections, gear, etc are of the left side of the plane. Set the part on the build plate with the correct orientation then mirror the part to get the right side of the plane. When you place the part on the build plate and rotate to a 45 degree angle when you mirror the part rotate the part back to the same 45 degree angle to get the same infill pattern for both parts.
Wing1 - 114g
Wing2 - 64g
Wing3 - 35g
Wing4 - 10g
WingTip - 3g
Aileron - 6g
Wing 1-4, Wingtip, Ailerons, and all of the tail sections:
Layer Height - 0.2
Initial Layer Height - 0.15
Wall Line Count - 1
Outer Before Inner Walls - Checked
Top Layer - 5
Bottom Layers - 4
Initial Bottom Layers - 4
Infill - 3%
Infill Pattern - Cubic Subdivision
Infill Line Directions - [45]
Infill Before Walls - Not Checked
Print Speed - 40mm/s
Infill Speed - 40mm/s
Outer Wall Speed - 40mm/s
Travel
Enable Retractions - Checked
Retract at Layer Change - Checked
Combing Mode - off (this will allow the retractions to happen and prevent sub extrusion)
Surface Mode - Normal
Front Cowl
Layer Height - 0.2
*Initial Layer Height - 0.15
Wall Line Count - 1
Top Layer - 6
Bottom Layers - 3
Initial Bottom Layers - 3
Infill - 0
Surface Mode - Normal
Rear Cowl there is a thrust tube designed to fit over the back of the 70mm EDF place on bed with back of cowl on the build plate.
*Initial Layer Height - 0.15
Wall Line Count - 1
Top Layer - 0
Bottom Layers - 0
Initial Bottom Layers - 0
Infill - 0
Surface Mode - Normal
Tail Pipe I designed the Cowl to have interchangeable tail section to change the performance of the EDF I flew my plane with the 90% FSA tail pipe the 80% will have more speed and less thrust. You can leave this section off also to get more thrust and less speed. The 80% have a more scale look.
*Initial Layer Height - 0.15
Wall Line Count - 1
Top Layer - 0
Bottom Layers - 3
Initial Bottom Layers - 3
Infill - 0
Surface Mode - Normal
¿Necesita más formatos?
Si precisa un formato distinto, por favor, abra una consulta de Soporte y solicítelo. Podemos convertir modelos 3D a: .stl, .c4d, .obj, .fbx, .ma/.mb, .3ds, .3dm, .dxf/.dwg, .max. .blend, .skp, .glb. Conversión de formato libreNosotros no convertimos escenas 3d y formatos como .step, .iges, .stp, .sldprt.!
Información de uso
Avión de pasajeros impreso 21 - Puede usar este modelo 3D libre de regalías tanto para fines personales como comerciales, de acuerdo con la Licencia Básica o Extendida.La Licencia Básica cubre la mayoría de los casos de uso estándar, incluyendo anuncios digitales, proyectos de diseño y visualización, cuentas empresariales en redes sociales, aplicaciones nativas, aplicaciones web, videojuegos y productos finales físicos o digitales (tanto gratuitos como comerciales).
La Licencia Extendida incluye todos los derechos otorgados bajo la Licencia Básica, sin limitaciones de uso, y permite que el modelo 3D se use en un número ilimitado de proyectos comerciales bajo las condiciones de la Licencia Libre de Regalías.
Leer más
¿Garantizáis la Devolución de Dinero?
Si. Si compras un producto y encuentras errores de rendimiento o descripción, intentaremos solucionar el problema lo antes posible. Si no lo logramos, cancelaremos tu pedido y tu dinero será devuelto en 24h, desde que el producto fué descargado. Lea más condiciones aquíPalabras clave
Artículos al azar de este autor
-20%
max
aerowar3D
Vehicle


No hay comentarios sobre este artículo.
sldprt sldprt sldprt sldprt sldprt sldprt sldprt sldprt sldprt
carocadelago
Other

sldprt sldprt sldprt sldprt sldprt sldprt sldprt sldprt sldprt
carocadelago
Other
fbx dwg max max obj stl max
Dufe
Other
-10%
obj iges obj sat step stl x x stl
TechItemsRock
Other
$9.00
$10.00
-50%
bip max sat sldprt step stl x x
Vetrock
Other